1. Introduction
If you want to let user upload files to the app through the browser on their computer, you can create an internal HTTP server with Flutter. This function is very useful, for example, if your app is just for watching videos or playing music offline, users can upload whatever they want.
2. Just do it
There are many issues we need to handle, but for now, I will only describe several main issues in this article, don’t worry, I will also provide the complete project’s source code at the end:
Ok, let’s solve the below main issues:
1) Create the HTTP server
We can use HttpServer to create the HTTP server and use bind method to set the IP and port
final s = await HttpServer.bind(address, port);
and listen to the request to handle any accesses
s.listen(_handleReq);

 _handleReq(HttpRequest request) async {
    ...
 }
But the next question is how can we get the IP address and pass it to the HttpServer ?
We can list all existing networks with NetworkInterface and filter the IP address type with IPv4
for (var interface in await NetworkInterface.list()) {
  for (var addr in interface.addresses) {
    if (addr.type == InternetAddressType.IPv4) {
      currentIP = addr.address;
    }
  }
}
but you will find that maybe there is more than one IP address in the list and only one is correct, so we also need to filter the IP starting with 192 to make sure this is the correct internal IP. This is working well in Android, but in iOS, maybe there is not only one IP start with 192, so we also need to check the network interface’s name whether is start with en, so the codes should be as below
 for (var interface in await NetworkInterface.list()) {
  for (var addr in interface.addresses) {
    if (addr.type == InternetAddressType.IPv4 &&
        (Platform.isIOS ? interface.name.startsWith('en') : 1 == 1) &&
        addr.address.startsWith('192')) {
      currentIP = addr.address;
    }
  }
}
2) Run the HTML files in HTTP server
We will put the HTML files in the server for the frontend layout, so we need to handle how to resolve the HTML files. You can put the HTML website in asset folder and update the pubspec.yaml
flutter:
  assets:
    - assets/
    - assets/webserver/
    - assets/webserver/css/
    - assets/webserver/fonts/
    - assets/webserver/js/
the HTML webserver folder structure is as below:
assets
    \webserver
        \css
        \fonts
        \js
        index.html
and then create a Map object to save the requested HTML files
import 'dart:typed_data';

class AssetsCache {
  /// Assets cache
  static Map<String, ByteData> assets = {};

  /// Clears assets cache
  static void clear() {
    assets = {};
  }
}
Based on the above code, we need to handle the listen even with _handleReq function:
first, get the request URL for the current access file
_handleReq(HttpRequest request) async {
    String path = request.requestedUri.path.replaceFirst('/', '');
    ...
}
the above code will get the current access file from the URL. For example the link is below:
first request url:  http://192.168.1.215:8080/index.html
second request url: http://192.168.1.215:8080/js/index.js
...
the first request path value will be index.html, and the second request path value will be js/index.js, so we can create a _loadAsset function to handle it, the function will return the actual request file from webserver folder:
Future<ByteData> _loadAsset(String path) async {
    if (AssetsCache.assets.containsKey(path)) {
      return AssetsCache.assets[path]!;
    }

    if (_rootDir == null) {
      // print('path=============');
      // print(join(assetsBasePath, path));
      ByteData data = await rootBundle.load(join(assetsBasePath, path));
      return data;
    }

    if (await Directory(_rootDir.path).exists()) {}

    debugPrint(join(_rootDir.path, path));
    final f = File(join(_rootDir.path, path));
    return (await f.readAsBytes()).buffer.asByteData();
}
and respond the file on client side
final data = await _loadAsset(path);

request.response.headers.add('Content-Type', '$mime; charset=utf-8');
request.response.add(data.buffer.asUint8List());
request.response.close();
after that, you should access your HTML website in the HTTP server.
3) Upload the file from HTML to Flutter
You can use any ajax method to upload the file from the client, but for my case, I use the jquery file upload plugin, I would not show the details for the client side, just show you the core codes for how to handle in server side (Flutter).
After using ajax to post the file to the server for uploading, we can get the file in flutter by MimeMultipartTransformer
var transformer = MimeMultipartTransformer(
          request.headers.contentType!.parameters['boundary']!);

var bodyStream = transformer.bind(request);

//get the file object
await for (var part in bodyStream) {

  if (isFirstPart) {
    isFirstPart = false;
  } else {
    //because we want to support the larger file, so need to split the file into many chunks for uploading, so need to remove other chunks' content-dispostion and just keep one should be ok
    part.headers.remove('content-disposition');
  }
  var fileByte =
      await part.fold<List<int>>(<int>[], (b, d) => b..addAll(d));
  if (fileByte.length > 1) {
    //just need to handle not zero size file chunk
    uploadFile.add(fileByte);
    await Future.delayed(Duration.zero);
  }
}
and then return the uploading status
final response = {
  'message': 'File uploadeding',
};
request.response
  ..statusCode = HttpStatus.ok
  ..headers.contentType = ContentType.json
  ..write(json.encode(response))
  ..close();
you can find more detailed codes here
3. Using the internal_http_server package
Alright, if you don’t want to code yourself, you can just use my internal_http_server package 🙂
3.1 Install the package
add the below into your pubspec.yaml
internal_http_server: ^0.0.3
3.2 Create the HTTP server
You need to create the server below
InternalHttpServer server = InternalHttpServer(
    title: 'Testing Web Server',
    address: InternetAddress.anyIPv4,
    port: 8080,
    logger: const DebugLogger(),
  );
3.3 Setup the description in your web server
You can set some descriptions in your web server, which will let users know what they can do or how they can do it with your server, for example, you want to let users upload the files
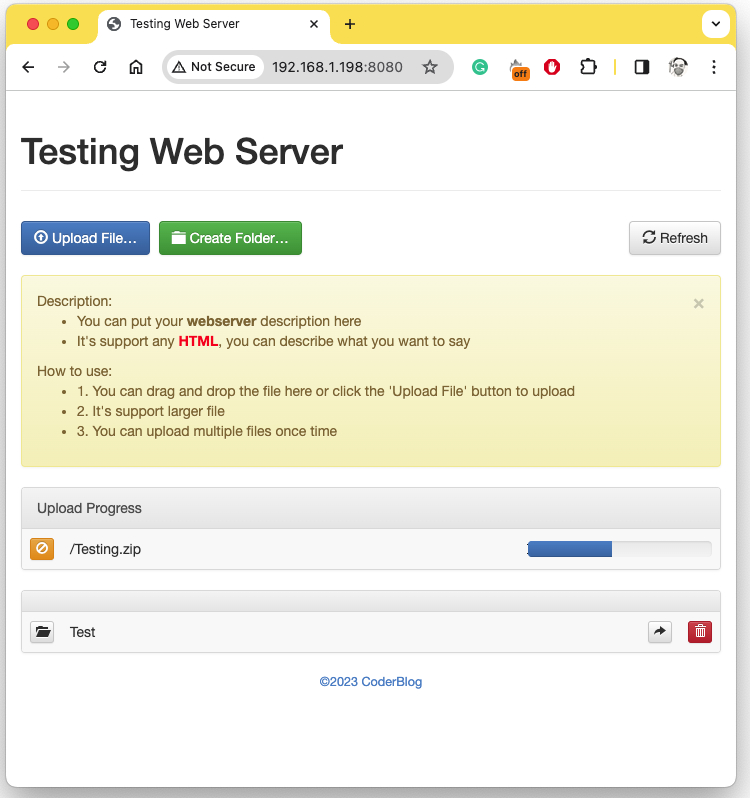
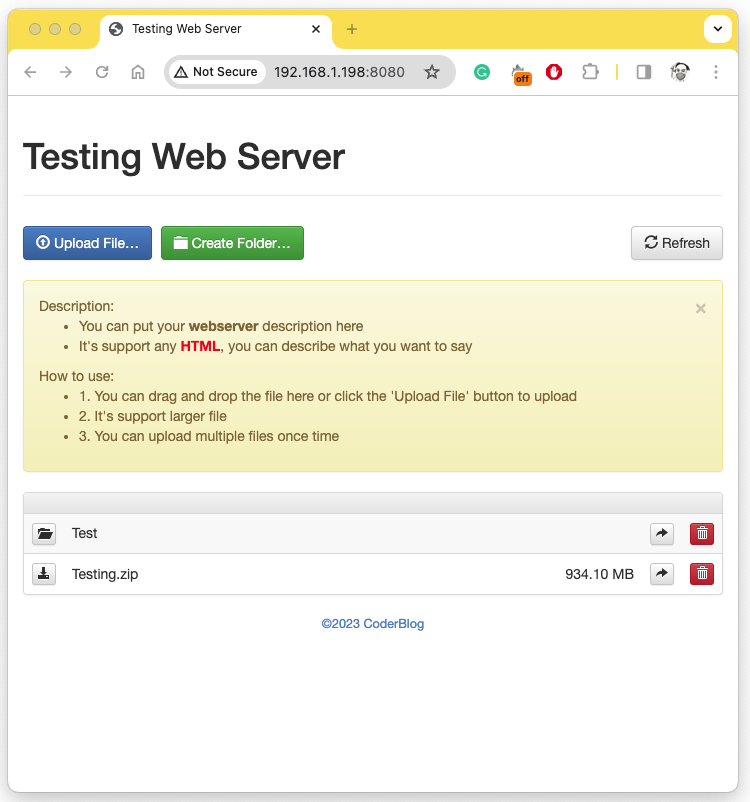
final String server_description = ''' Description:
        <ul>
          <li>
            You can put your <strong>webserver</strong> description here
          </li>
          <li>
          It's support any <strong style='color:red'>HTML</strong>, you can describe what you want to say
          </li>
        </ul>

        How to use:
        <ul>
          <li>1. You can drag and drop the file here or click the 'Upload File' button  to upload</li>
          <li>2. It's support larger file</li>
          <li>3. You can upload multiple files once time</li>
        </ul>
       ''';

server.setDescription(server_description);
3.4 Create the start and stop server method
It needs to create the start and stop methods for the server
startServer() async {
  server.serve().then((value) {
    setState(() {
      isListening = true;
      buttonLabel = 'Stop';
    });
  });
}

stopServer() async {
  server.stop().then((value) {
    setState(() {
      isListening = false;
      buttonLabel = 'Start';
    });
  });
}
You can create a button to start and stop the server
ElevatedButton(
  child: Text(buttonLabel),
  onPressed: () {
    if (isListening) {
      stopServer();
    } else {
      startServer();
    }
  },
),
also, you need to let the user know the IP address of your web server, so you should get the device IP as below and show the IP in your APP, use the NetworkInterface to get the current network in the device
Future<String> getCurrentIP() async {
  // Getting WIFI IP Details
  String currentIP = '';
  try {
    for (var interface in await NetworkInterface.list()) {
      for (var addr in interface.addresses) {
        print(
            'Name: ${interface.name}  IP Address: ${addr.address}  IPV4: ${InternetAddress.anyIPv4}');
        if (addr.type == InternetAddressType.IPv4 &&
            addr.address.startsWith('192')) {
          currentIP = addr.address;
        }
      }
    }
  } catch (e) {
    debugPrint(e.toString());
  }
  // print('currentIP========: $currentIP');
  return currentIP;
}
After that, you should show the IP for the user like the below screen
and access the IP from the PC browser, you will find the website below, you can drag and drop the file to upload it
In the end, you can find the complete example here.
4. Conclusion
If you want to create the internal HTTP server in your app, there are still many technical issues that need to be solved, so I created a package for that, you can easily and for free to use, but I think there are still many things need to enhance of the package, grateful if you would help to enhance it 🙂
![]()


